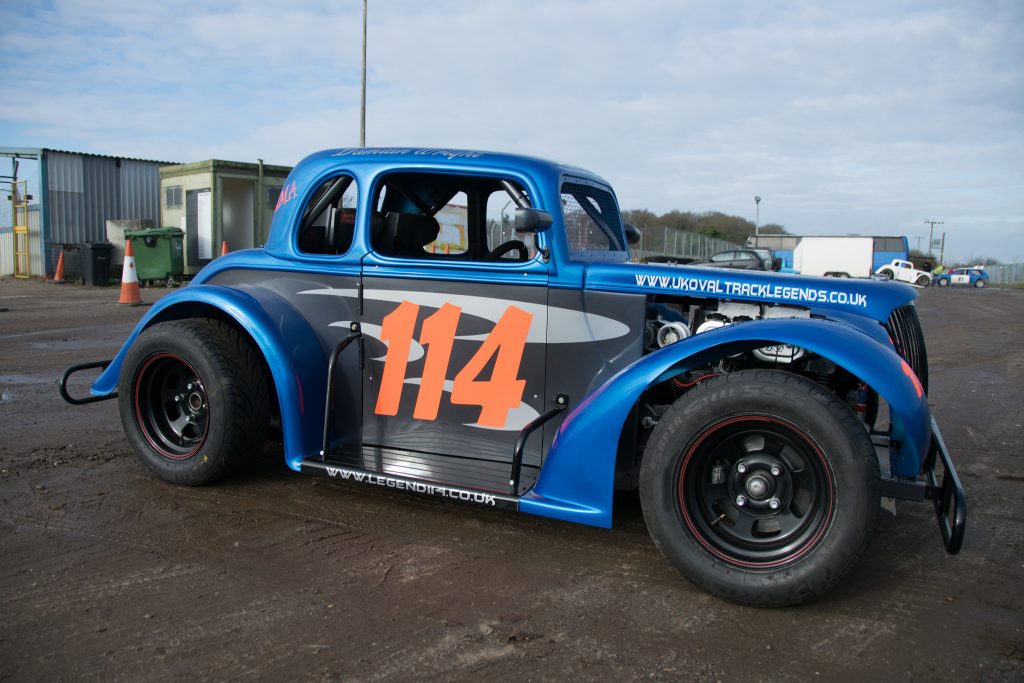
With all the images I took at Swaffham of Damian’s car when he was there for pre-season testing, I liked the results of the tweaks I’d made in Lightroom but now I wanted to produce some proper “poster” style images, something more creative than just a photo with a few tweaks. I took one of the images I was particularly pleased with and started playing around with it.
Here’s the original photo:-
I took this into Lightroom and applied a few tweaks (quite a few actually), and here’s the result :-
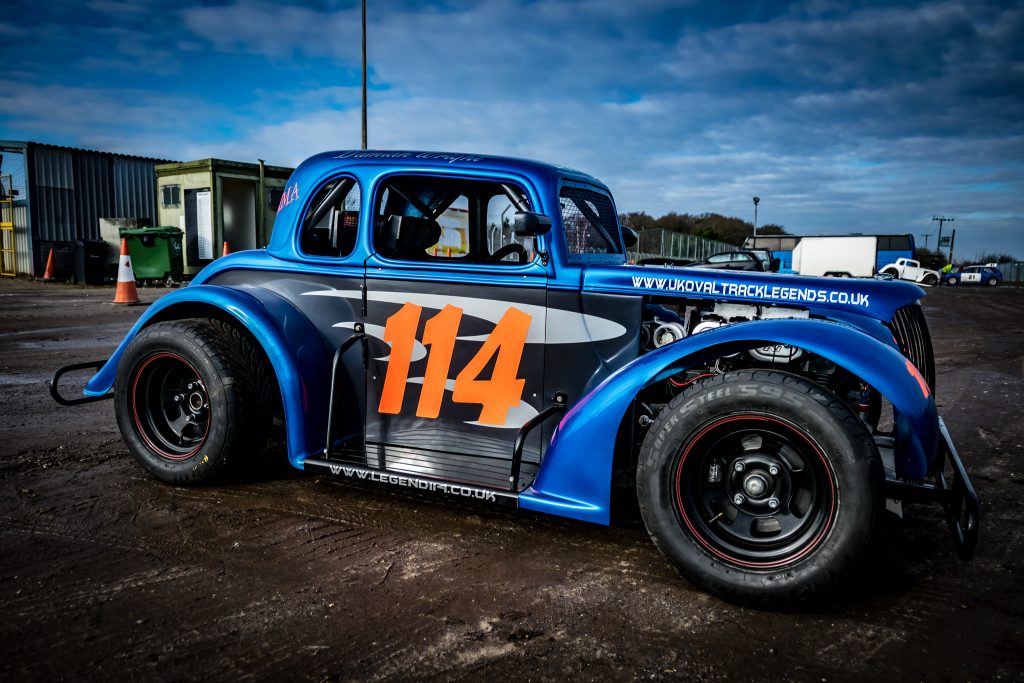
I like this because it gives the car a sheen it didn’t really have on the day and extenuates it to the max., even the tyres look glossy and the sky is considerably more dramatic that it actually was.
I decided the background however was too cluttered, and the high gloss finish had in fact made certain background elements stand out even more, the bright orange cone behind the car for example, and the other cars in the distance. The post that appears to be sticking out of the car roof was also bugging me, so I took the image into Photoshop and used the spot healing brush to remove the post, and used the quick selection tool to highlight the car, invert the selection and add a black and white layer to set the background to monochrome :-
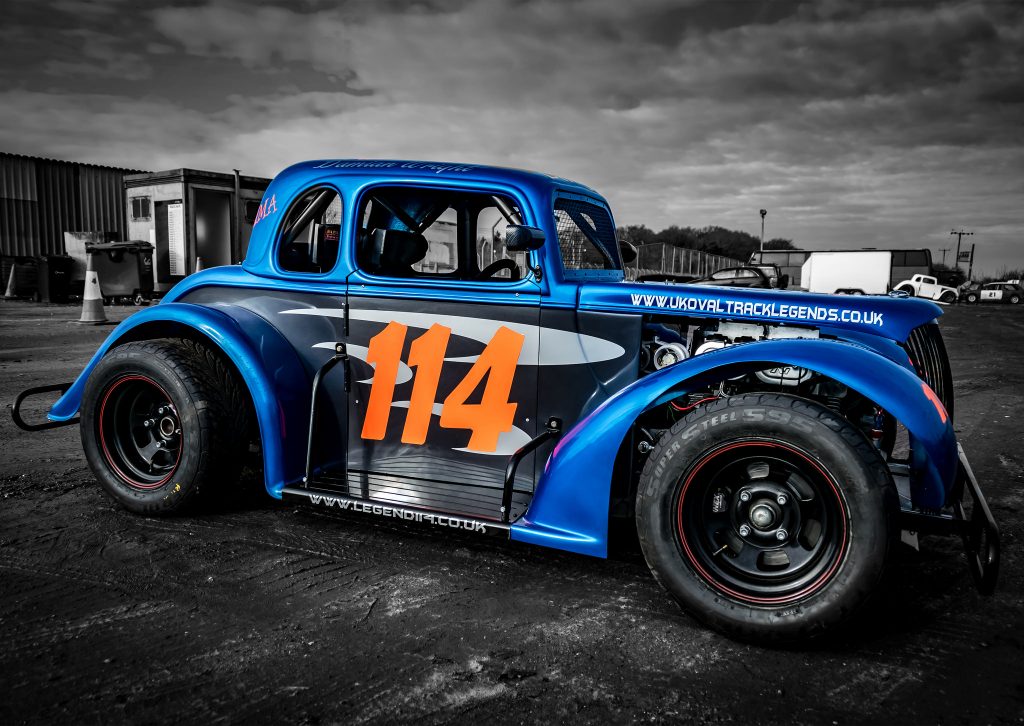
I’m now really liking this image, the car stands out against the background quite nicely, and at this point I thought my work was done, I even made this the desktop background on my Mac at work so I could gaze lovingly upon my creation all day!
However, it started to bug me again that the background elements were still distracting. I really, really should’ve given more thought to composition at the time, and paid proper attention to what was in the background. School-boy error on my part!
So with the image still in Photoshop I decided to go even further, and this is the result :-
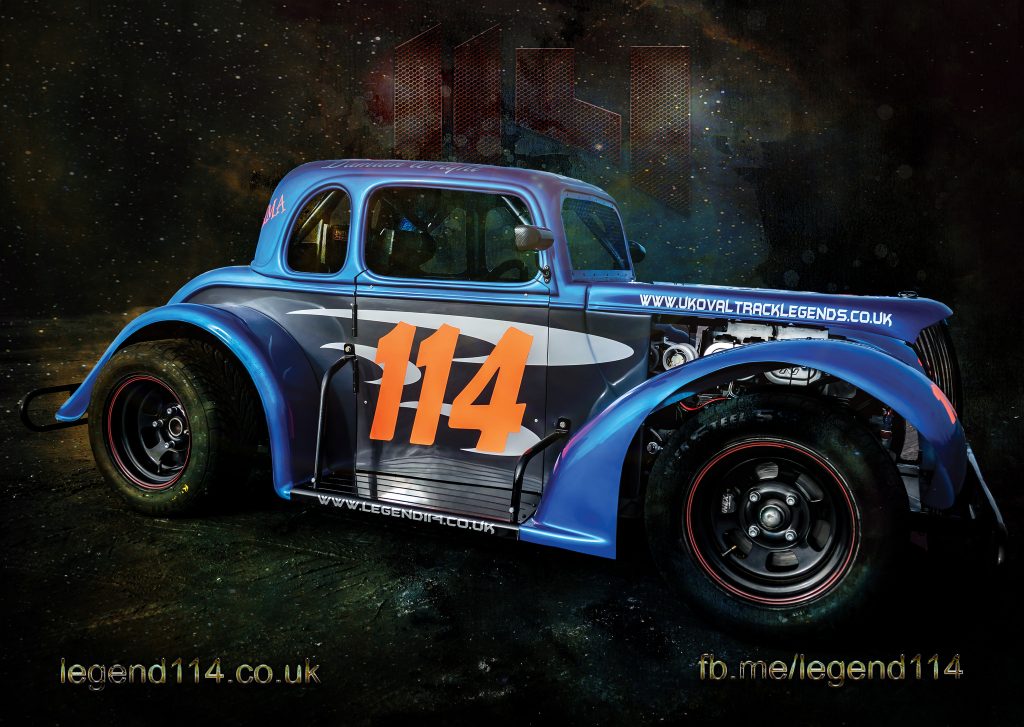
I’ve now almost completely eliminated the background, removing the sky and all the clutter behind the car, leaving only the car and the ground it stands on from the original image. I’ve also added a few textures I had saved to colour the background and provide some interest to it, adding these and setting the blend mode to overlay or screen to get the desired effect. I then added a layer mask to the overlays and used the eraser brush to bring the car back to the forefront. I deliberately left some of the overlay on top of the wheels and inside the car however to help the car blend into the background a bit better.
I then added some text, and applied pre-saved styles to them, to make it a “poster” rather than a photoshopped photo, and have saved the original to A2 size at 300 dpi with the aim of perhaps getting this printed.