At the weekend I went to Swaffham Raceway, where my step-son and his friends had booked in for a practise session in their Legends racing cars. Legends is a formula within UK Oval Track racing, and prior to the start of the season it’s common for many formulas to book their cars into practise sessions. Swaffham offers a cheap (£20 per car) session every Saturday, and is about an hour’s drive from where we live. At these sessions it’s also possible to get closer to the track than at normal racing events, so an ideal opportunity for me to take some pictures of my step-son’s car, especially as it’s new for this season and quite frankly looks stunning in it’s blue and gun-metal gray livery.
Here is a picture I took from track-side using my 35mm f1.8 prime lens:
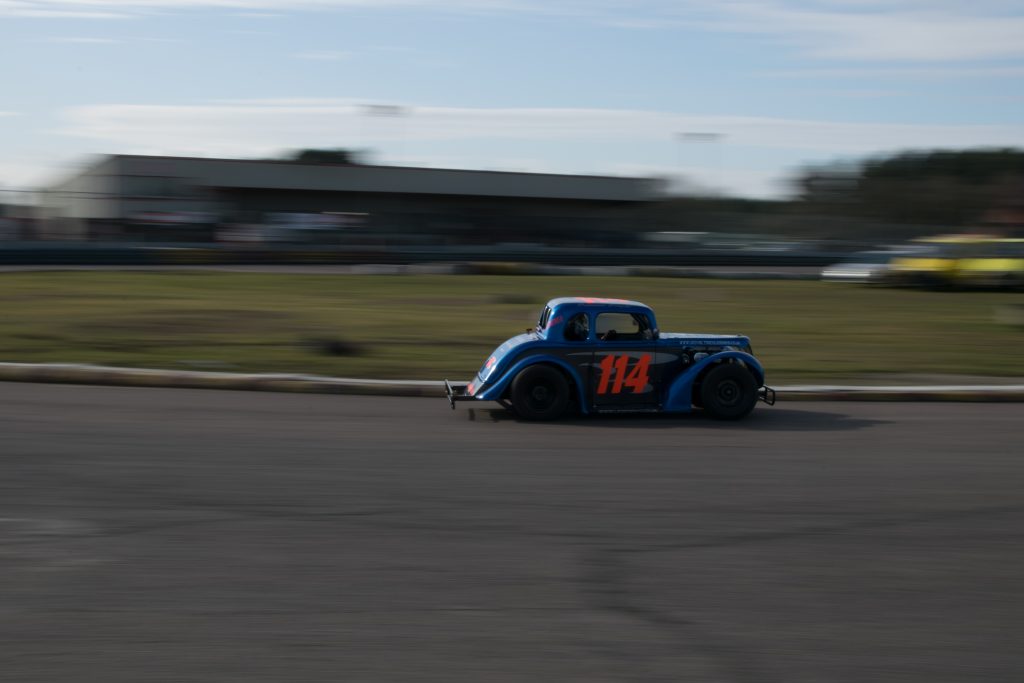
1/40th – f/22 – 35mm – ISO100
Not a particularly good photograph you might say, and you’d be right, but it’s one of the few I managed to take at a slow shutter speed that was actually in focus (just!). This was taken at 1/40th of a second, very slow by my standards. I’m sure a pro with superior technique could capture an image even slower, but I’m proud of this one. As I’d used Shutter Priority the camera had to set the Aperture really narrow to get the correct exposure, this is at f/22, but that’s OK as it at least ensures all of the car is in focus!
However, it actually isn’t that great a photo when you think about it. I’m shooting into the sun (which is top left just out of sight), and it’s rather under-exposed as a result. It also looks a bit bland anyway because it was a slightly cloudy overcast day. So I decided this image would be a good candidate for some post-processing in Lightroom, the photographers post-processing software of choice!
After some cropping and tweaking this is what I came up with:
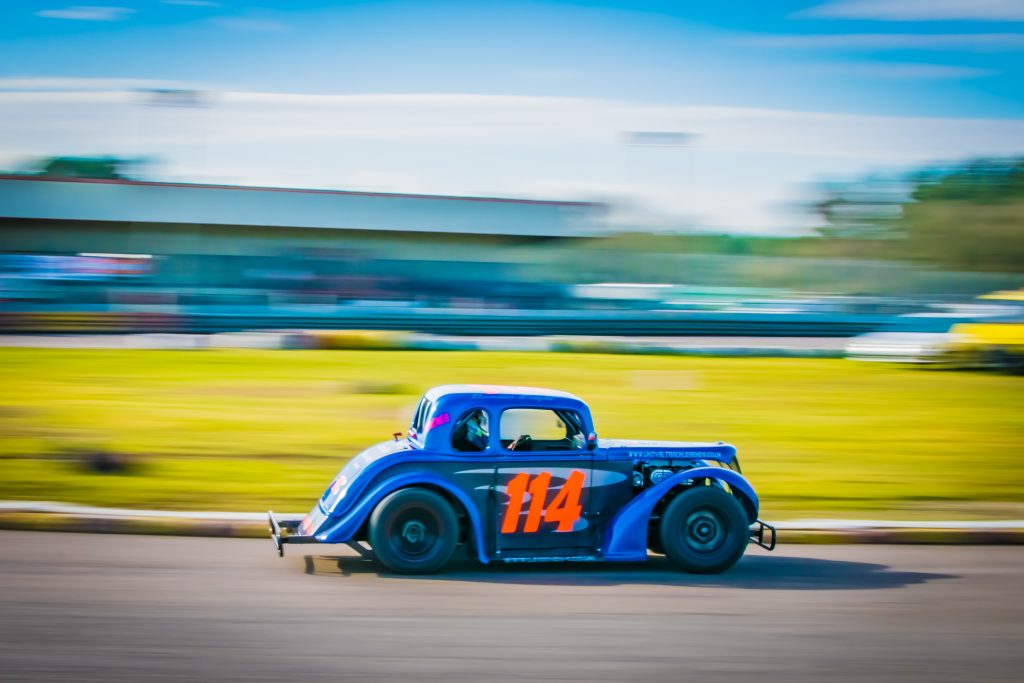
As you can see, quite a dramatically different image!
First I cropped the image, to put the car vertically central, and bigger in the frame (this was taken with a 35mm lens, so even at close range it was never going to fill the frame). I also cropped a chunk off the bottom to put the car in the bottom half of the picture horizontally. There is a thing in photography called the “rule of thirds”, which states that putting the subject of the image off centre (vertically or horizontally, or both) results in a more pleasing image, because it defines which part of the image is the subject, and which is the background. This is more a guideline than a rule, but it works in this case. The car being positioned below the centre line, with less track on show, leads the eye to the conclusion the car is the subject and the track / in-field / stadium / sky etc. is the background.
The next thing to do was correct the exposure. As the image was captured in RAW format, I had a lot of scope for adjusting the image in post-processing. As it was under-exposed I slid the exposure slider to the right to increase exposure till I was happy it was correct, or at least more correct than to start with to my untrained eye. I then adjusted highlights, shadows, blacks and whites to bring out the detail in the car. In the original image the wheels are a solid black and there is little detail on the side of the car facing the camera.
Then I started playing with effects. There are several available in Lightroom, including vibrance, saturation, clarity, haze etc., and I find by sliding these right over to one side or the other I can see what they do and then crank them down as required until I’m happy with the result. I wasn’t trying to produce a realistically accurate picture here, I was trying to be a bit creative, so it didn’t matter if the result was “real”, just whether it looked good (in my opinion).
I think what I’ve ended up with is a fairly pleasing image, the colours are considerably more vibrant, which enhances the blurring of the background leading to a greater impression of movement than in the original. The bright blue of the car and the bright green of the background highlights the car more etc. All in all I’m happy with the result, and happy that I was able to bring out the core element of the original image, the car against a blurred background implying speed of movement, in a more positive way than the original image conveyed.