First of all a disclaimer, this post isn’t me, as an expert motorsports photographer, explaining what settings one should use for motorsports photography, this is me as a complete novice explaining what settings I think I should be using and my reasoning behind them!
I’m primarily interested in taking photographs at racing circuits such as Snetterton, which is an hour away from where I live. It’s a very accessible circuit, with many viewing areas, much of which is not limited by catch fences getting in the way. I understand other circuits are much more difficult to photograph.
I’m also primarily taking 2 different kinds of photo. A “head-on” image where the intention is to freeze the action, and a “side-on” image where the intention is to blur everything except the vehicle to inject a sense of motion. Each requires different settings, and different techniques, but before getting into specifics here are some settings I use common to both scenarios:-
- Single-point focus: My camera has poor auto-focus performance so I tend not to rely on it. Using a single, central, focus point I try to ensure the vehicle is underneath the red centre dot when I press the shutter to ensure it’s in focus.
- Continuous auto-focus: Again my camera isn’t very good at this, but as the vehicle moves you will (probably) want the camera to re-focus for each shot, so set it to continuous.
- Continuous shooting: Why take one picture when you can take several? I’m going to want to fire off as many shots as I can in the hope one or more are “keepers”.
- Centre-weighted Metering: I’m going to want the thing I’m focusing on to be correctly exposed, which is the thing (hopefully) directly under my centre focus point, so why expose for the whole scene? Centre-weighted is supposed to expose for whatever’s in the centre of the frame. For landscapes I’d use matrix or evaluative metering, but that’s not the case here.
- Shoot RAW: I’m not a professional photography who needs to get pictures straight out of the camera into a news feed, and I’m never going to upload images anywhere without sorting through them first, which I do in Lightroom as it’s great at the task, so I shoot RAW to give myself the best chance of being able to produce good images.
- Shutter Priority mode with Auto-ISO: I set the camera to Shutter Priority (S on the dial, I believe on a Canon it’s tV), and set auto-ISO to ON with max ISO = 12800 (the highest my camera can achieve).
Head-on shots
My camera has poor auto-focus, but head-on images don’t necessarily require good auto-focus performance. The technique I (try) to use in this scenario is to pre-focus on the spot I intend to take the photo at (usually a slow bend) and then press the shutter button as the vehicle arrives at that point. Because the intention here is to freeze action I would set a high shutter speed. How fast the shutter speed needs to be is the tricky part, it depends on the vehicle, and on the conditions. If it’s a bright sunny day and I can get 1/2000th with a low ISO, then great, but if not it’s a case of trial and error to find a shutter speed fast enough to freeze the action but not too fast so as to increase ISO beyond an acceptable level.
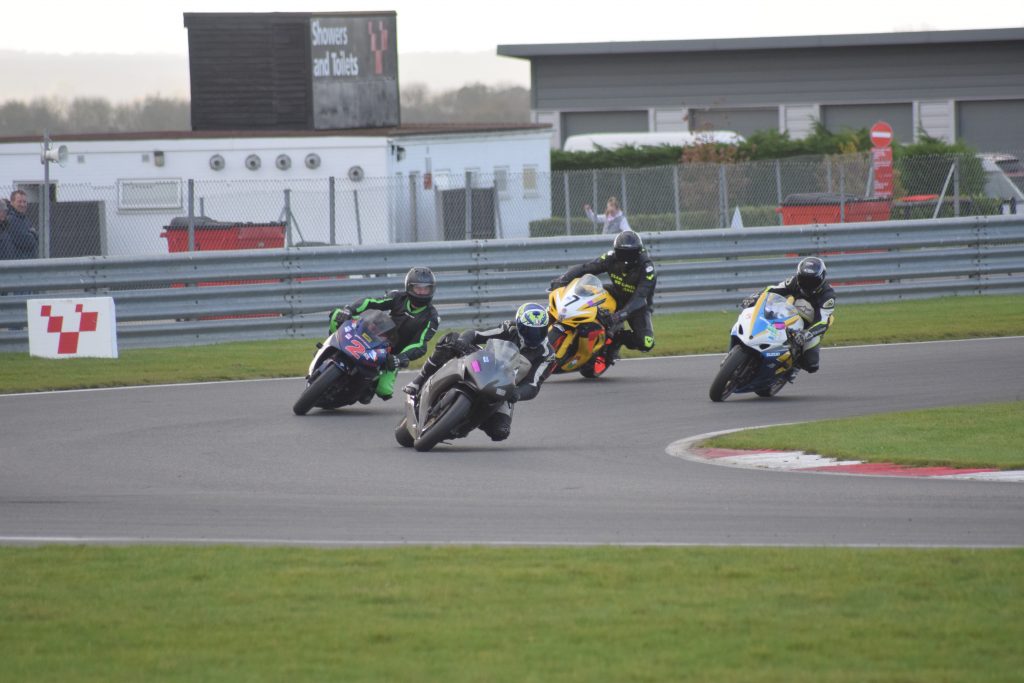
1/1250th / f5.6 / ISO900 / 300mm
The fast shutter speed has frozen the action, you only get a sense of motion because the bikes are leaning into the corner. If these had been cars they would’ve appeared to be parked on the track.
This image begs the question: did I need 1/1250th shutter speed? I probably could’ve halved that and in turn halved the ISO, giving a less noisy image (though it’s not that noisy to begin with). Also, this was at the full extent of my 70-300mm lens. I now have a new 150-600mm lens so should be able to frame this image better by getting in closer to the action.
Side-on shots
Taking pictures side-on generally involves a technique called “panning” whereby the camera follows the vehicle as it moves using a slow shutter speed, with the intention being the vehicle is in focus but everything else isn’t, which injects a sense of speed into the image. This is way easier said than done, and requires great technique, which I don’t have! Practise makes perfect, as they say, I just need a lot of it!
Here are some examples of bad and not so bad shots:-
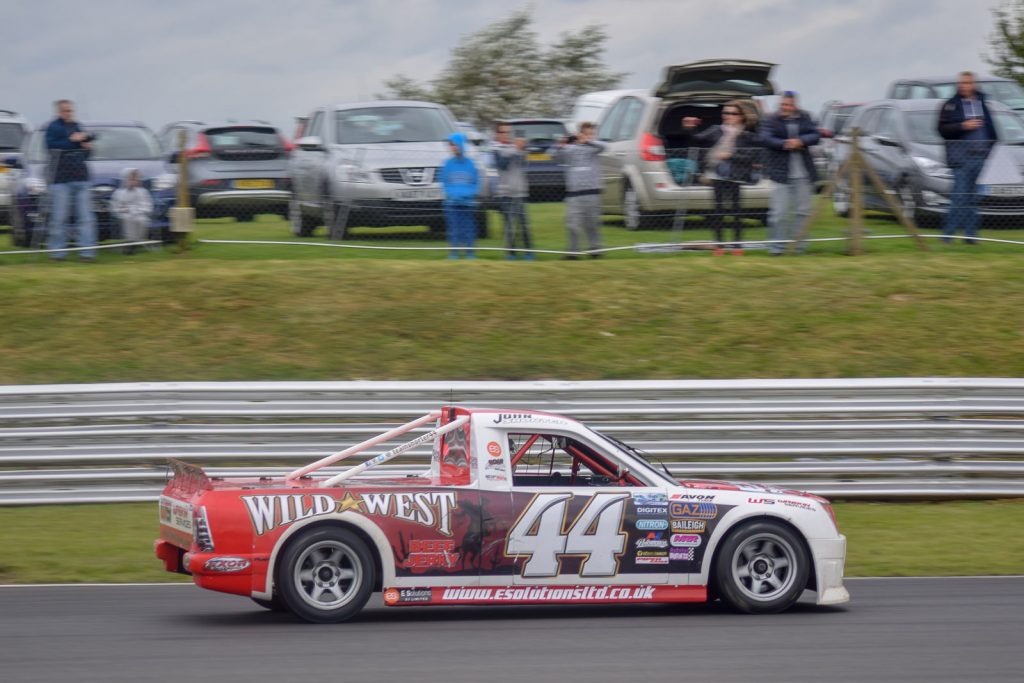
1/500th / f4.5 / ISO100 / 100mm
This is a bad image because although the car is reasonably sharp, there’s little sense of motion, you can see the spokes of the wheels and the people and cars in the background have only minimal blur. This could just as easily have been a picture of a car parked on the track, with the background slightly out of focus. No sense of speed or drama in this image.
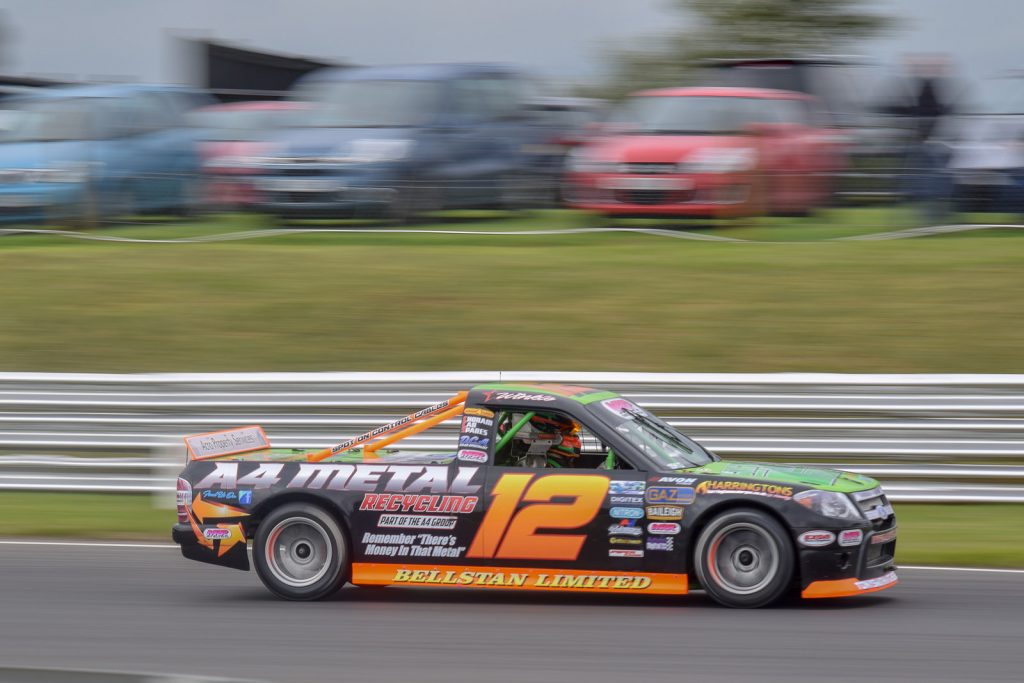
1/125th / f8 / ISO100 / 100mm
This image is better, as the wheels of the car and the background are now much more blurred, which gives this image a sense of motion. I don’t believe the car is as sharp as I’d like, possibly due to the poor lens used (I have a better one now I’m itching to use!) but just as likely my poor technique.
You should note these images were taken from the same spot, probably not too far apart. Both at ISO100, the best quality my camera can produce, but the bottom image is two stops slower shutter and two (-ish) stops lower aperture.